Best eSIM for Bali: Packages, How to Use & Where to Get

Planning a getaway to Bali but worried about staying connected? In recent years, eSIMs have become the ultimate choice for travellers exploring the Island of the Gods!
Simply purchase your plan online before you land at Denpasar, follow a few quick steps to activate it on your device, and you’re ready to share your beach sunsets instantly—it’s fast, reliable, and incredibly convenient. Trip.com has prepared this comprehensive Bali eSIM Guide to help you get started and choose the perfect data plan for your island adventure. Read on to find out more!
Which Data Package Is Best for Your Bali eSIM?
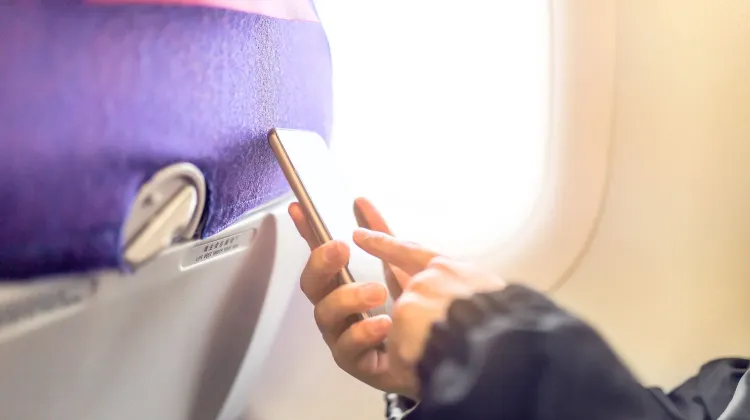
a person holding up a mobile phone with a logo on it Via Unsplash (by Opal Pierce)
Not sure how much data you'll need? I've put almost every Trip.com package to the test, so let me break it down for you! For a typical week in Bali—think plenty of Google Maps, social media scrolling, and WhatsApp chats—I usually breeze through 3-5GB. Here’s how to pick the perfect plan for your trip:
Bali eSIM 1 Day
- CountryBali, Indonesia
- Package Option500MB/Day
- Number of Days1 Day
- PriceAUD 1.48
Bali eSIM 7 Days
- CountryBali, Indonesia
- Package Option5GB
- Number of Days7 Days
- PriceAUD 8.48
Bali eSIM 10 Days
- CountryBali, Indonesia
- Package Option500MB/Day
- Number of Days15 Days
- PriceAUD 14.75
What Exactly Is a Bali eSIM, and How Does It Work?
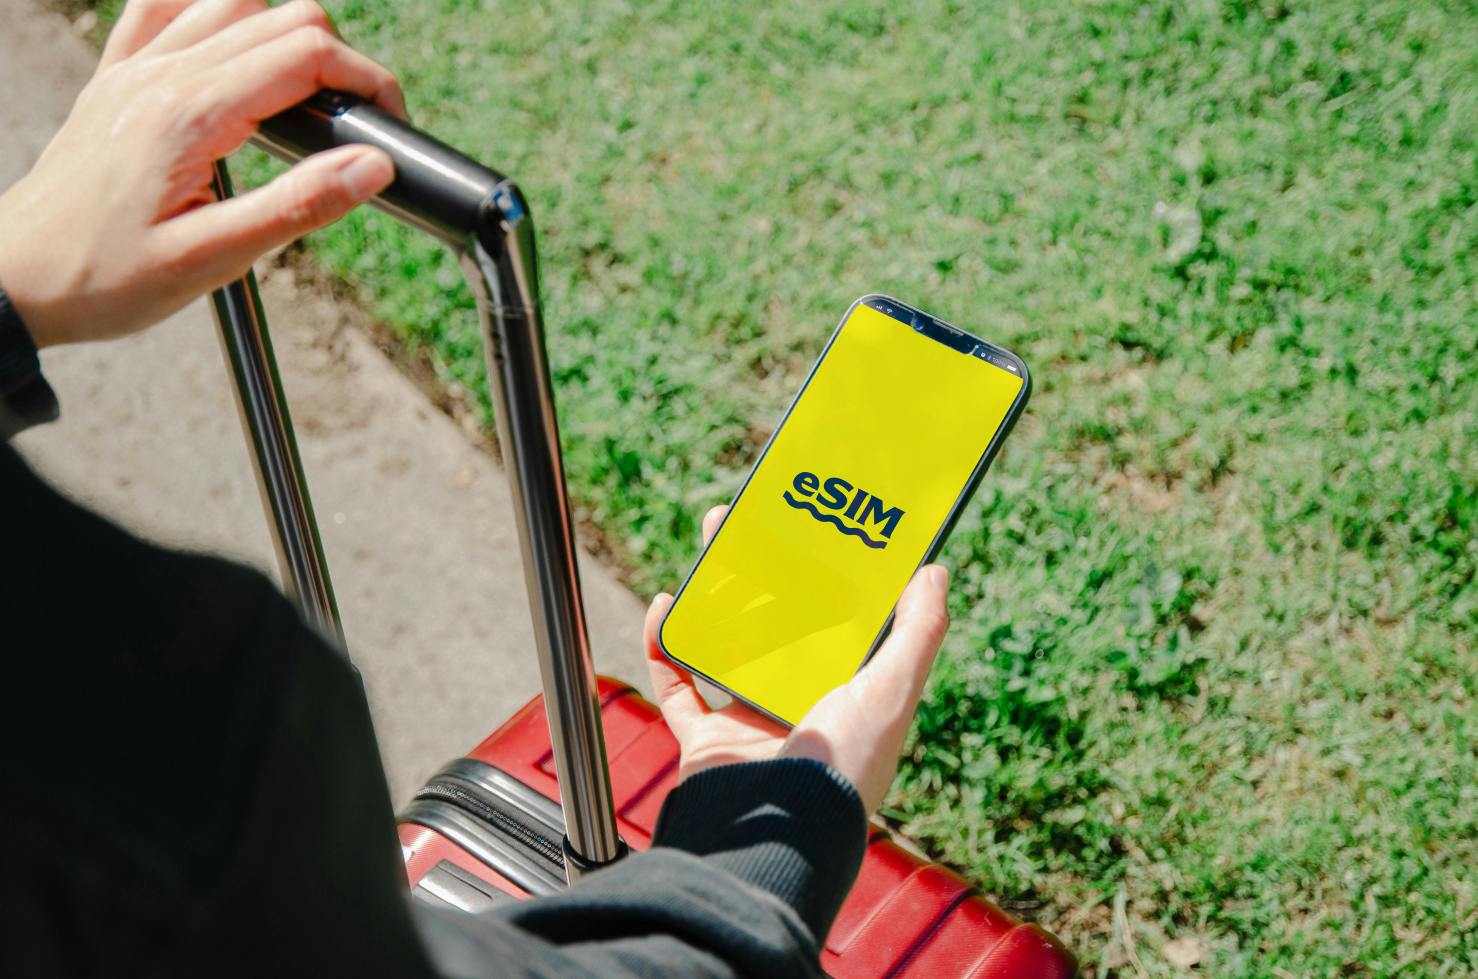
A person holds a smartphone showing an eSIM app while standing with luggage outdoors in Los Angeles. Via Pexels (by Jacob)
Think of an eSIM as a digital version of a SIM card that’s already built into your phone. Instead of fiddling with a tiny plastic card, you simply scan a QR code, and—just like that—you’re connected and ready to explore!
I love using Trip.com's eSIMs, because the process is a breeze: simply purchase yours online before you travel, receive a QR code, scan it, and you're all set to explore!
Keep your regular SIM active for calls from home while using your Bali eSIM for local data—no more juggling two phones or fumbling with tiny SIM cards!
Planning a Trip to Bali? Here’s Why You Might Need a SIM Card or eSIM
Yes, you absolutely do!
You’ll need data for just about everything here—from uncovering those secret hidden beaches and snagging fair prices on Grab (the local go-to for rides), to checking out restaurant reviews and coordinating with your tour guides. Plus, let’s be real: you’re going to want to share those stunning sunset shots and breathtaking rice terrace views the moment you snap them!
Even if you aren't big on social media, having Google Maps and WhatsApp (which is essential for everyone in Bali) is pretty much a must for getting around easily and staying connected.
So, should you opt for a physical SIM card or an eSIM? Having tried both, I’m officially Team eSIM all the way—especially with Trip.com’s super affordable and diverse plans. It’s just so much easier than hunting down a local shop, dealing with passport copies, and fumbling to swap out your home SIM card. Plus, you can get everything set up before you even leave home! That said, if you really need a local phone number or your device doesn't support eSIM, a physical SIM card is a solid backup—just be prepared to spend some of your precious vacation time at a phone shop when you could be hitting the beach instead!
SIM Card, Wi-Fi, or eSIM: How to Choose the Best Option for Your Bali Trip
After countless trips to Bali, let me help you choose the perfect way to stay connected. Each option has its pros and cons, so let's find what works best for your adventure!
eSIM | SIM card | Portable WiFi Router | |
The Highlights | Super convenient—no need to stress about losing or damaging anything! Enable dual SIM functionality | It’s usually more budget-friendly than an eSIM or a portable Wi-Fi router; Plenty of options available | Connects to multiple devices; Works seamlessly across all your devices |
The Downsides | Keep in mind that not all devices are eSIM-compatible; More expensive | Might be a bit of a hassle; Risk of loss or damage | It's not quite as portable as a SIM card or eSIM; Can be a bit pricey |
- eSIM: You can get everything set up before you even take off, all while keeping your home SIM active. No hunting for stores, no carrying extra devices—just scan a QR code and you’re ready to explore! The only catch? Your phone needs to be eSIM compatible (though most newer models are). For seamless, stress-free connectivity with fantastic coverage across Bali, this is hands-down my top recommendation.
- Portable WiFi Router: These handy little devices create your own personal hotspot and can connect multiple devices at once—perfect for group trips! You can rent them at the airport or book online. The downside? It’s one more gadget to carry and keep charged, plus you’ll need to remember to return it before you head home. And honestly, the connection can be a bit spotty in more remote areas.
- Traditional SIM Card: Local SIM cards from Telkomsel offer both data and a local number for around 150k IDR (about AU$14). You’ll get great coverage, but keep in mind you’ll need to visit a store with your passport in hand and swap out your home SIM card. It’s a fantastic option if you really need a local number, but it can be a bit of a hassle if you don’t. Plus, you run the risk of missing important messages on your home number!
How to Get a SIM Card in Bali, Indonesia: Your Ultimate Guide
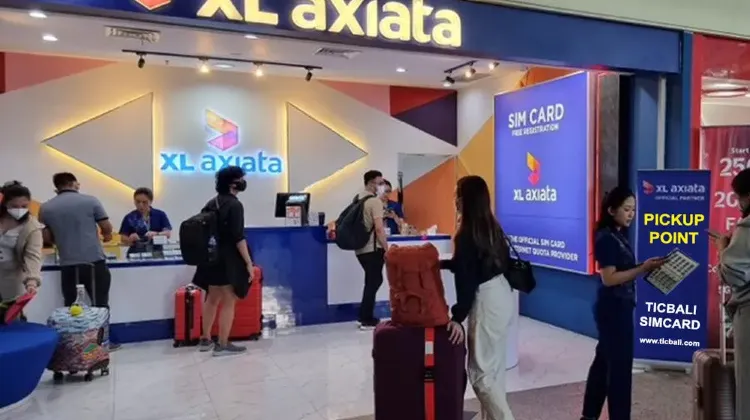
You’ve got three main options: airport SIM card vendors (super convenient but pricey), official carrier stores like Telkomsel (best prices, though a bit more paperwork), or those little phone shops you’ll see popping up everywhere. A quick heads-up: try to skip those shops in tourist areas that promise "the best deal"—they often overcharge like crazy!
Your Step-by-Step Guide:
- Don't forget your passport—it's a must-have, no exceptions!
- Make your way to an official Telkomsel store—they offer the best coverage around!
- Budget for around 150k-200k IDR (AU$21-27)
- Be sure they register it correctly—this is super important!
- Give it a quick test before you head out of the store!
- Don't forget to hold onto your receipt!
Pro tip: If that sounds like a bit too much effort (especially after a long flight), that’s exactly why I made the switch to Trip.com’s eSIM. However, if you absolutely need a local number, Telkomsel is your best bet. Just a heads-up: try to avoid the sellers at the airport unless you don’t mind paying a premium for the convenience!
See all attractions
 99984 booked

How to Activate and Use Your eSIM for Your Bali Adventure
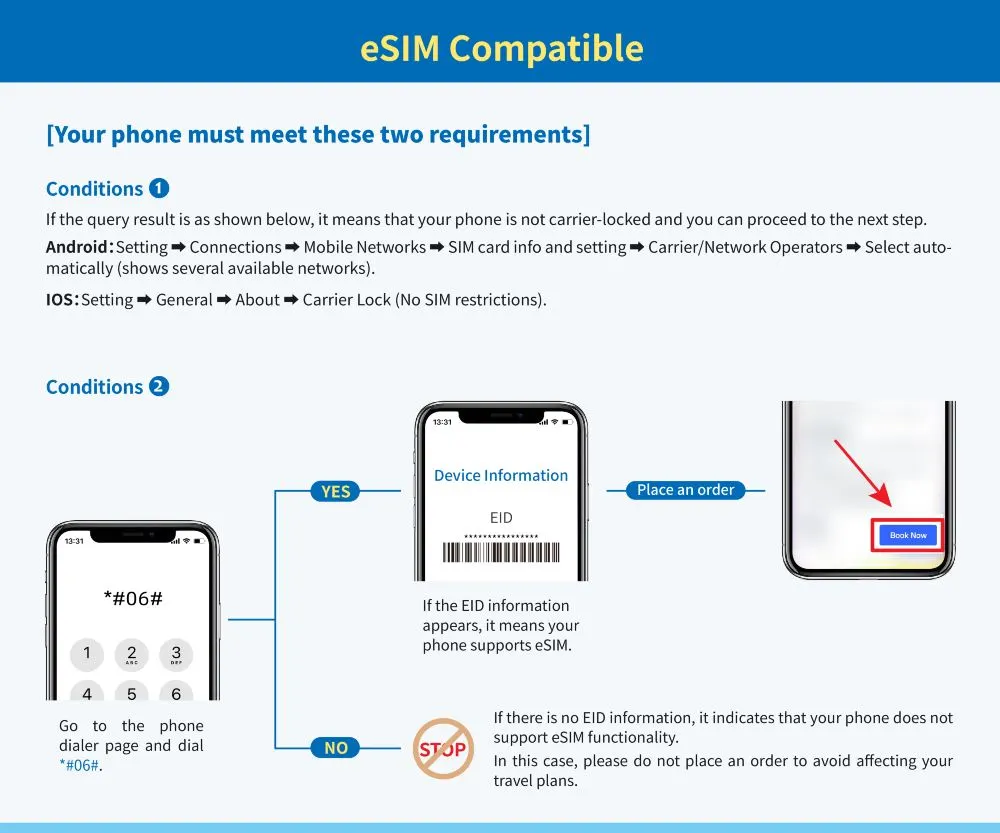
Check If Your Phone Supports eSIMs
Before you snag that awesome Trip.com eSIM deal for your Bali getaway, let’s double-check that your phone is ready for action! If you’re rocking a recent iPhone, most Samsung flagships, or a Google Pixel, you’re all set. Not sure? Just head over to your Settings and look for 'Add eSIM'—if you see it, you’re ready to get connected!
Quick test: dial *#06# on your phone—if you see an EID number, you're all set! Also, just a quick reminder to make sure your phone isn't carrier-locked (if you're not sure, simply check with your home provider).
Easy Steps to Install Your Bali eSIM
Once you’ve purchased your eSIM on Trip.com, you’ll receive an email containing your QR code. Here’s the process that worked perfectly for me:
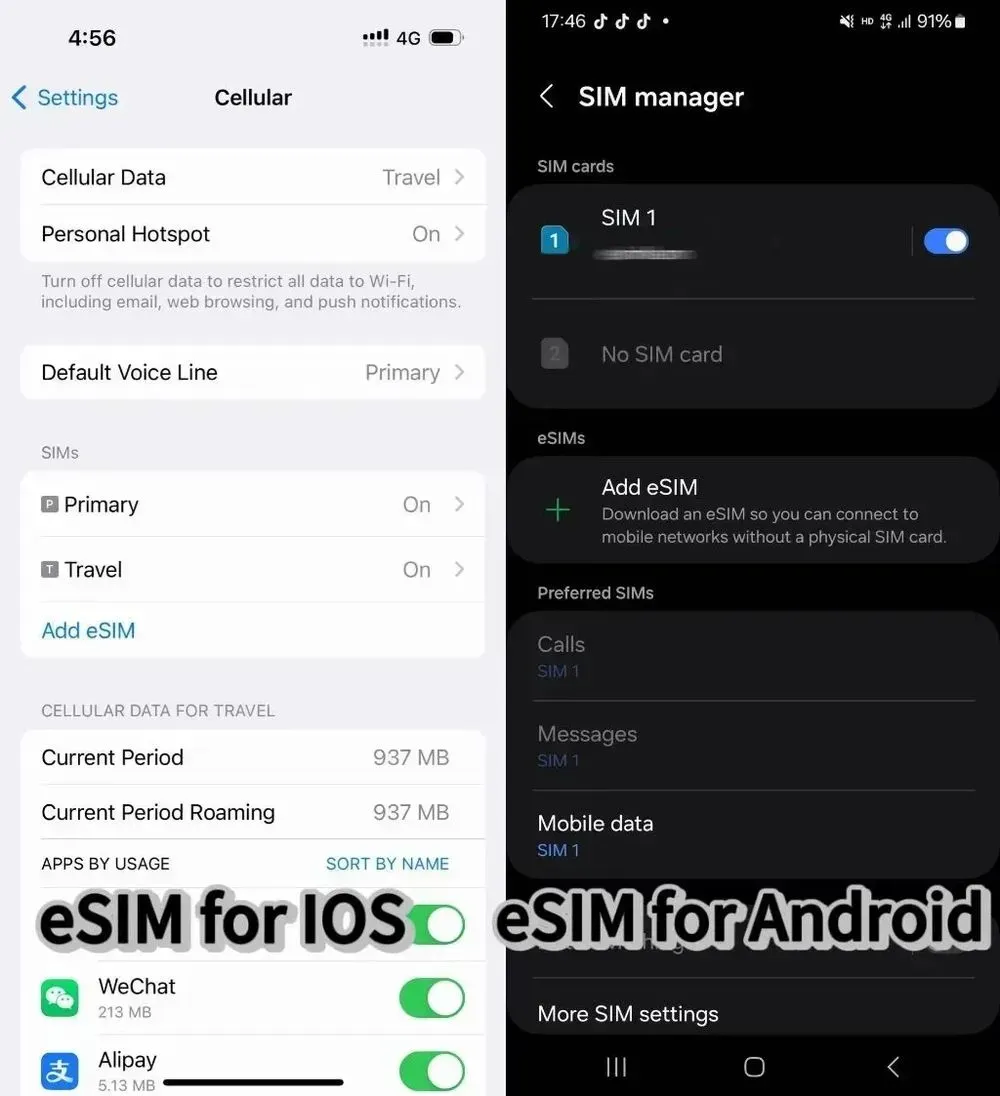
How to set it up on your iPhone:
- Make sure you've got a stable WiFi connection—this is super important!
- Head over to Settings > Mobile/Mobile
- Tap "Add Mobile Plan" to get connected and start your adventure!
- Open your Trip.com eSIM email
- Scan the QR code directly through your settings (not your camera!)
- Simply follow the prompts to complete your setup and get ready for your next journey!
- Give it a name like "Bali Trip" so you can easily find it later!
Calling all Android explorers:
- Get connected to WiFi
- Head over to Settings > SIM Card Management
- Add a new SIM card
- Scan your QR code through your settings
- Simply follow the setup prompts to get started on your next adventure!
Essential Travel Tips
- Please don't remove your eSIM once it's installed, as you won't be able to reinstall it using the same QR code!
- Make sure to install it before you take off, but be sure to do so within your plan's start date!
- Have your Trip.com order number ready to go (reach out to crm@51tgt.com if you need a hand)!
- If you decide to extend your trip, you can easily renew right through Trip.com—no need to reinstall anything!
Hotels Recommendation in Bali
See All Hotels


FAQs about eSIM Bali
-
What eSIM should I use in Bali?
-
Can I keep my Australian phone number with an eSIM in Bali?
-
What are the downsides of using an eSIM in Bali?
-
What is the best SIM card for Bali tourists from Australia?
-
How much does an eSIM for Bali cost for Australians?
-
Can I buy a Bali eSIM after I have already arrived in Bali?
Disclaimer: This article has been provided by an individual contributor or third party platform. If there is any discrepancy regarding the copyright, please contact us directly and we will delete the content immediately.
Trending Searches
-
eSIM/SIM card
-
Featured guides
-
Popular Cities
-
Latest Flight Deals
-
Popular Attractions
- Dubai to Bali Flights
- Taipei to Bali Flights
- Melbourne to Bali Flights
- Hyderabad to Bali Flights
- Chiang Mai to Bali Flights
- Port Vila to Bali Flights
- Nairobi to Bali Flights
- Kuching to Bali Flights
- Ulaanbaatar to Bali Flights
- Mumbai to Bali Flights
- Auckland to Bali Flights
- Sunshine Coast to Bali Flights
- Ahmedabad to Bali Flights
- Harare to Bali Flights
- New Delhi to Bali Flights
- Forbidden City Tickets
- Tokyo Disneyland Ticket
- Universal Studios Japan
- Shanghai Disneyland Ticket
- Puffing Billy Tickets
- Shanghai Tower
- Canton Tower
- Yu Garden
- Zhangjiajie National Forest Park
- Canggu Bali
- Universal Beijing Resort
- Hong Kong Disney Land
- Taronga Zoo Sydney minisite
- Sydney Aquarium Ticket
- China Harbin Ice and Snow World